Master the art of posing with our comprehensive guide, packed with essential techniques and tips for photographers of all levels. Discover how to capture authentic, confident, and elegant moments effortlessly, ensuring every shot tells a story.
1.1 Importance of Posing in Photography
Posing is a cornerstone of photography, elevating images from ordinary to extraordinary. It helps subjects exude confidence, authenticity, and elegance, ensuring photos capture their true essence. Proper posing avoids stiffness and poor posture, creating natural, flattering compositions. Whether for portraits, weddings, or casual shots, effective posing enhances storytelling and visual appeal. It guides photographers to highlight their subjects’ best features while maintaining comfort and expression. Mastering posing techniques empowers photographers to create memorable, professional-quality images that leave a lasting impression. This guide provides expert tips to refine your approach and elevate your photography skills.
1.2 Key Areas Covered in the Guide
This guide offers a comprehensive exploration of posing techniques for photography, covering essential topics like relaxation, body angles, and facial expressions. It provides tips for individuals, including men, women, and children, as well as group and family poses. The guide also addresses outdoor and indoor settings, leveraging natural light and studio setups. Advanced techniques, such as using triangles and lines, are explored, along with practical advice on avoiding common mistakes. With a focus on authenticity and confidence, this guide equips photographers with the tools to create stunning, professional-quality images in any scenario.
General Posing Tips for Everyone
Relaxation is key to natural poses. Adjust body angles to flatter your form, use facial expressions to convey emotion, and avoid stiff or awkward positioning for authentic results.
2.1 Relaxation and Natural Posture
Relaxation is the foundation of natural posing. Start by rolling your shoulders down and away from your ears to release tension. Take deep breaths to calm your nerves, ensuring your posture remains effortless. Avoid stiff poses by slightly softening your joints—this creates a more authentic look. Keep your spine straight but not rigid, allowing your body to feel at ease. Natural posture enhances confidence and ensures your photos look genuine and spontaneous. Remember, the goal is to appear relaxed, not forced, so subtle adjustments can make a significant difference in the final result.
2.2 Understanding Body Angles
Understanding body angles is key to creating dynamic and visually appealing poses. Start by positioning your body at a slight angle to the camera rather than facing it directly, as this creates depth and slims the silhouette. For women, a gentle “S-curve” pose can add elegance, while men can adopt a broader, confident stance. Ensure shoulders are relaxed and avoid stiff, boxy shapes; Experiment with turning your head slightly to create intrigue. Pay attention to how hands and feet are positioned to avoid stiffness. Varying angles adds dimension and keeps compositions engaging, making your photos more captivating and professional.
2.3 The Role of Facial Expressions
Facial expressions are crucial for conveying emotion and authenticity in photos. A natural, relaxed smile can instantly enhance a pose, while a forced one may look unnatural. Encourage subjects to soften their features and avoid tension. Subtle adjustments, like slightly raising an eyebrow or tilting the head, can add depth to the image. Eye contact with the camera creates a powerful connection, but looking away can also evoke mystery. Remind your subjects to breathe and relax their facial muscles to avoid stiffness. The right expression can elevate a pose from ordinary to extraordinary, capturing the essence of the moment effortlessly.
Posing for Individuals
Explore expert tips for men, women, and children to easily capture authentic, engaging portraits that highlight individuality and confidence, and ensuring memorable photos.
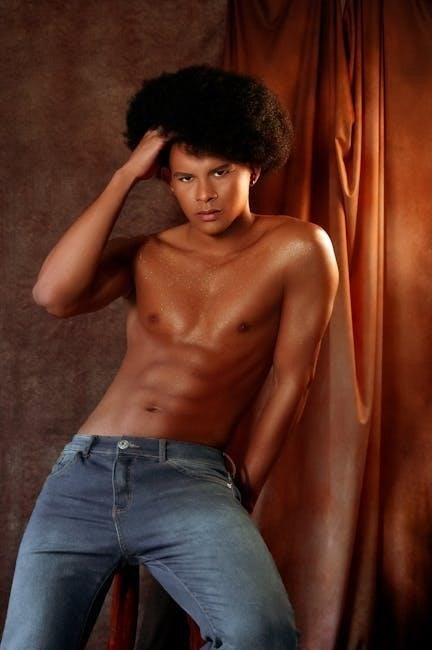
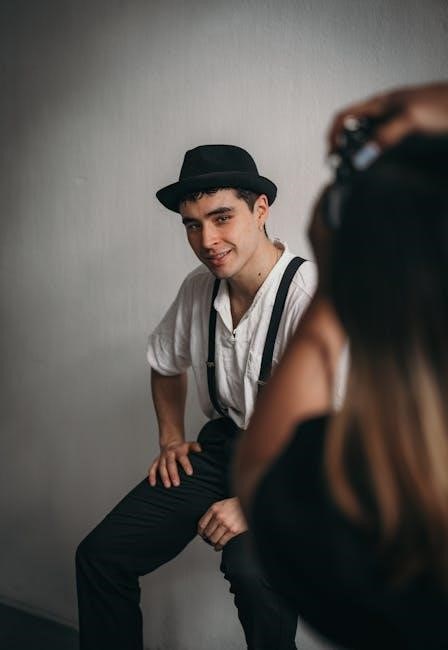
3.1 Tips for Men: Confidence and Strength
Help men exude confidence and strength through purposeful poses. Standing with feet shoulder-width apart and shoulders back creates a powerful stance. For a relaxed yet strong look, suggest leaning slightly forward or placing hands on hips. Sitting poses can emphasize authority—try spreading legs slightly or resting arms on knees. Encourage natural facial expressions, like a subtle smile or a focused gaze, to convey authenticity. Avoid stiff postures and guide them to use their hands purposefully, such as placing them in pockets or on thighs. These techniques ensure photos capture masculinity and self-assurance effortlessly.
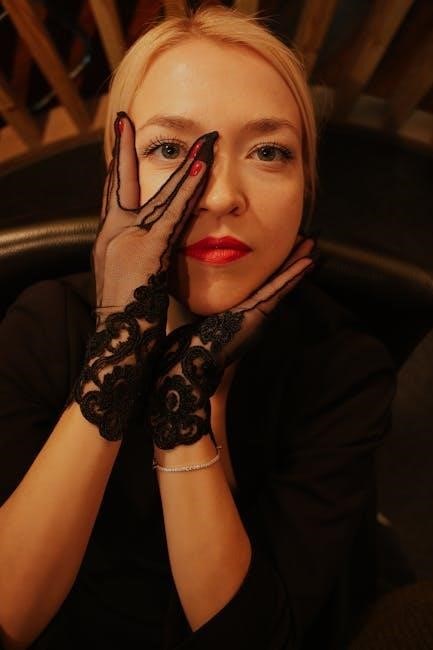
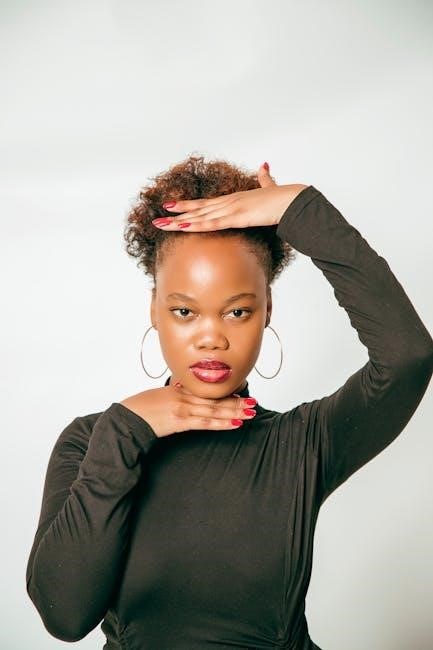
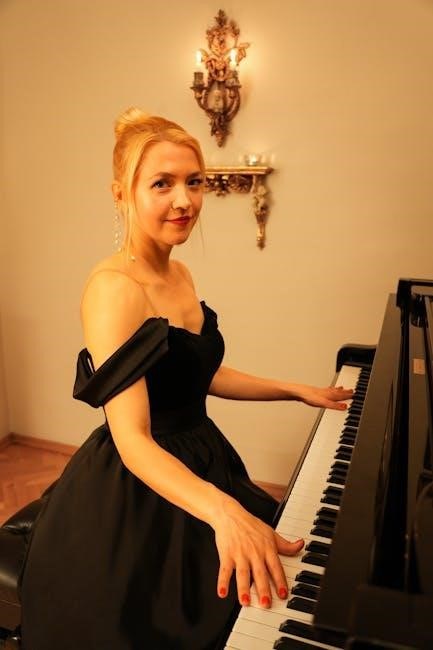
3.2 Tips for Women: Elegance and Grace
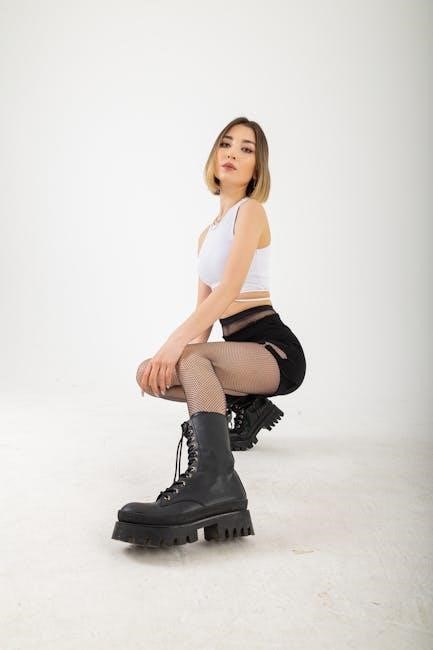
Help women radiate elegance and grace through thoughtful poses. Standing with one leg slightly bent or a hand on the hip creates a soft, feminine curve. For seated poses, suggest crossing ankles or placing one leg over the other for a refined look. Emphasize the S-curve by gently shifting weight to one side. Encourage subtle smiles and gentle eye contact to convey warmth. Guide hands to rest naturally, such as placing one on the thigh or holding the arm slightly away from the body. Avoid rigid postures and focus on relaxed, flowing movements that highlight grace and poise.
3.3 Posing for Children: Capturing Innocence
Capturing children’s natural charm requires a playful and patient approach. Encourage them to embrace their curiosity and energy, allowing for candid, spontaneous moments. Use props like toys or balloons to keep them engaged and comfortable. Suggest gentle movements, such as twirling or jumping, to create lively, dynamic poses. Ensure they are dressed in comfortable clothing that allows free movement. Focus on capturing genuine emotions, like laughter or curiosity, rather than forced smiles. Keep the environment familiar and fun to help them relax and express their unique personality authentically.
Posing for Groups and Families
Harmonize group compositions by varying heights and angles, creating dynamic triangles. Encourage interaction and natural engagement to capture authentic connections and timeless memories together.
4.1 Creating Harmonious Group Compositions
Harmonious group compositions are achieved by balancing heights and angles. Start by arranging taller individuals in the back and shorter ones in the front. Use staggered positions to avoid a flat, uniform line. Encourage slight variations in posture to add depth and visual interest. Guide participants to create gentle angles with their bodies, ensuring no one is directly facing the camera. This approach minimizes stiffness and fosters a natural, cohesive look. Remember, the goal is to capture connections and unity while maintaining individuality.
4.2 Managing Different Heights and Ages
When posing groups with varying heights and ages, balance is key. Position taller individuals toward the back and shorter ones in the front to ensure visibility. Use levels, such as stairs or chairs, to create a staggered effect. For children, encourage them to sit or stand slightly in front to capture their expressions. Direct older participants to relax their shoulders and avoid slouching. Mix ages naturally, placing younger and older members together to create visual harmony. Ensure everyone’s face is visible by adjusting angles and gently guiding heads. This approach fosters a cohesive yet dynamic group dynamic.
4.3 Encouraging Interaction and Engagement
Fostering genuine interaction in group photos creates authentic, memorable shots. Encourage conversation among participants to ease tension. Use props or activities to spark natural engagement. Direct individuals to place a hand on shoulders, hold hands, or lean slightly toward each other to build connection. Vary head heights by tilting or angling faces to add depth. Capture candid moments by keeping the atmosphere light and fun. Guide participants to interact playfully, like whispering a joke or sharing a smile. This approach ensures everyone feels involved and the photos exude warmth and spontaneity.
Mastering Facial Expressions
Facial expressions are key to conveying emotion in photos. Learn techniques for authentic smiles, meaningful eye contact, and capturing genuine feelings to enhance your portraits and storytelling.
5.1 The Perfect Smile: Techniques and Tips
A genuine smile enhances any photo, creating a lasting impression. To achieve this, relax your facial muscles and think of a happy memory. Avoid forced expressions; instead, subtle, natural mouth movements work best. Ensure your eyes smile too, as they convey authenticity. Practice in front of a mirror to find your most flattering smile. Guiding your subject to slightly part their lips or tilt their head can add softness. Remember, the key is to make the smile feel effortless and true to the person’s personality for captivating results.
5.2 Eye Contact: Connecting with the Camera
Eye contact is a powerful tool for creating a connection in photographs. Direct your gaze softly at the camera lens to engage the viewer, avoiding a forced stare. For a natural look, slightly relax your eyes and think of something pleasant. If not looking directly at the camera, focus on a point just beyond it to maintain a genuine expression. Ensure your eyes align with the light source to avoid harsh shadows. Practice varying eye positions to convey different emotions, from confidence to vulnerability, enhancing the depth of your photos.
5.3 Expressing Emotions Authentically
Authentic emotional expression is vital for compelling photographs. Encourage subjects to relax their facial muscles to avoid stiffness. Subtle movements, like a slight smile or raised eyebrow, can convey genuine feelings. Guide them to think of personal experiences or emotions to evoke sincerity. Avoid forced expressions; instead, create a comfortable environment where subjects feel natural. Use prompts like recalling a happy memory or imagining a scenario to capture authentic reactions. This approach ensures the emotions in the photos feel real and relatable, enhancing the image’s impact and storytelling ability.
Posing for Full-Body Shots
Master full-body poses by emphasizing balance and confidence. Standing poses highlight strength, while sitting and lying down poses offer comfort and creativity, capturing authentic moments naturally.
6.1 Standing Poses: Balance and Confidence
Standing poses are fundamental for capturing balance and confidence in full-body shots. Keep shoulders back and spine straight to maintain good posture. Distribute weight evenly on both feet or shift slightly onto one leg for a relaxed yet poised look. Avoid stiff positions by softening knees slightly. Use arms to frame the body—rest hands on hips or let them fall naturally. Ensure facial expressions align with the pose, keeping it natural and authentic. These tips help create dynamic, confident, and balanced standing poses that enhance any photo. Practice these techniques to master the art of standing poses effortlessly.
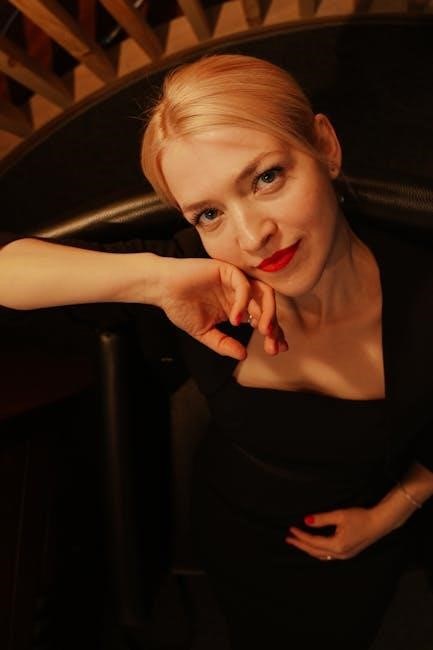
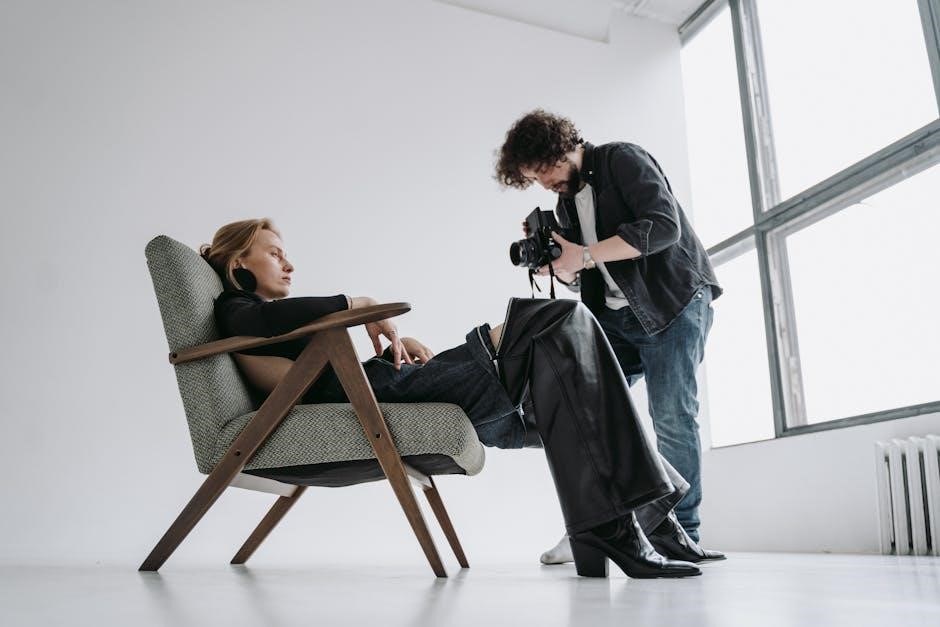
6.2 Sitting Poses: Comfort and Elegance
Sitting poses offer a blend of comfort and elegance, perfect for capturing relaxed yet refined moments. Maintain good posture by keeping your back straight and shoulders relaxed. Cross your legs or ankles for a polished look, or sit with one leg slightly tucked for a more casual vibe. Avoid slouching or leaning forward excessively. Use your arms to enhance the pose—rest them gently on your lap or place one hand on your knee. Ensure your facial expression remains soft and natural, complementing the pose. These techniques create inviting, comfortable, and elegant sitting poses that add depth to your photos.
6.3 Lying Down Poses: Creativity and Relaxation
Lying down poses add a unique dimension to photography, blending creativity with relaxation. To execute these poses effectively, focus on maintaining natural angles and soft curves. Keep your upper body slightly lifted to avoid a flat, lifeless appearance. Experiment with placement of arms—rest them beside you or gently above your head. Use props like pillows for support and comfort. Ensure your facial expression remains calm and inviting. These poses are ideal for capturing serene, artistic moments, offering a fresh perspective in your photos while exuding relaxation and elegance.
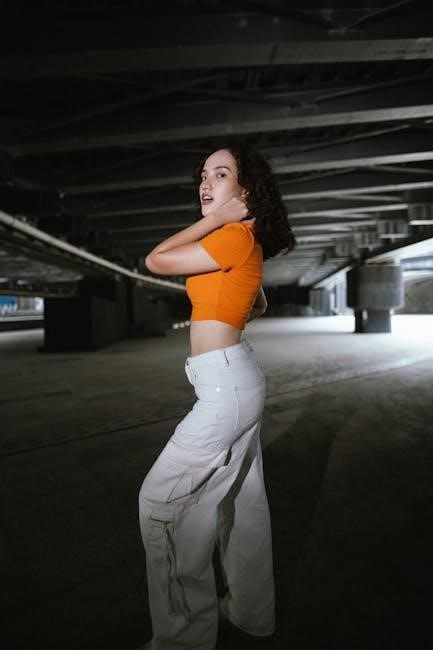
Posing for Outdoor and Indoor Settings
Adapt your poses to complement the environment. Outdoor settings benefit from natural light and shadows, while indoor shoots thrive with controlled lighting and creative prop usage, enhancing authenticity and creativity.
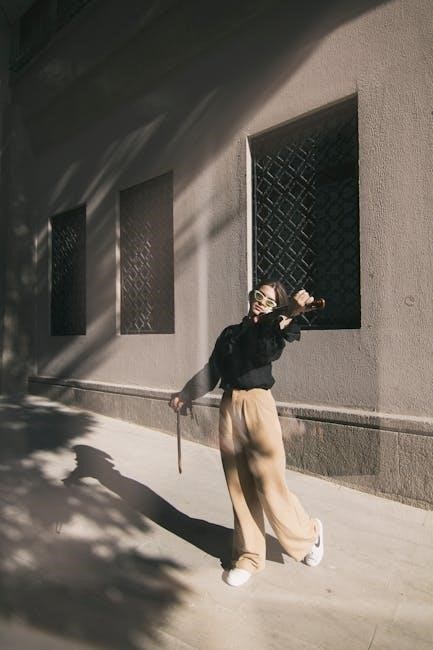
7.1 Leveraging Natural Light Outdoors
Natural light is a photographer’s best ally. Position subjects during the golden hour for soft, warm tones. Use the sun’s direction to create flattering shadows and highlights, avoiding harsh midday light. For portraits, place the sun slightly off-camera to minimize squinting. Experiment with backlight for silhouettes or rim lighting. Keep your subject relaxed and remind them to tilt their face towards the light for a radiant glow. This approach ensures outdoor shots are vibrant, authentic, and full of life.
7.2 Working with Studio Lighting Indoors
Studio lighting offers precision and control for indoor shoots. Use softboxes to create soft, even illumination, and sidelights to add depth and dimension. Position the main light source slightly above eye level to avoid unflattering shadows. Experiment with backlights to separate the subject from the background. Guide your subject to stand or sit comfortably, ensuring their face is well-lit. Adjust the lighting angles to enhance features and minimize imperfections. Practice experimenting with different setups to achieve the desired mood and ensure your subject feels at ease in front of the camera.
7.3 Utilizing Props and Environments
Props and environments can elevate your photos by adding personality and context. Use items like vintage chairs, flowers, or hats to create authentic, engaging scenes. Natural settings, such as parks or rustic barns, offer unique backdrops that enhance storytelling. Indoors, incorporate furniture or textured walls to add depth. Ensure props complement the subject and setting without distracting. Experiment with creative placements to guide the viewer’s eye. Blend the subject seamlessly with the environment for cohesive, dynamic compositions that capture the essence of the moment and tell a compelling visual story.
Advanced Posing Techniques
Elevate your photography with sophisticated posing methods, incorporating triangles, lines, and dynamic angles. Experiment with bending, twisting, and shadow play to create visually striking, professional-level compositions.
8.1 Using Triangles and Lines in Composition
Triangles and lines are powerful tools in creating balanced and dynamic compositions. By positioning arms, legs, or hands to form triangular shapes, you can add depth and visual interest. Leading lines, such as the direction of the gaze or the flow of clothing, guide the viewer’s eye through the frame; These techniques not only enhance the subject’s form but also create a sense of movement and harmony, making the image more engaging and professional.
8.2 Bending and Twisting for Dynamic Poses
Bending and twisting can add energy and depth to your poses, creating a sense of movement and fluidity. Softly bending the knees or arching the back introduces dynamism, while twisting the torso can create intriguing angles. These poses draw the viewer’s eye through the frame, adding complexity to the composition. Encourage natural transitions between bends and twists to avoid stiffness, ensuring the pose feels organic and engaging. Experimenting with these movements can elevate your photos, making them more captivating and full of life.
8.3 Playing with Shadows and Highlights
Shadows and highlights are powerful tools for creating depth and dimension in photography. By strategically positioning your subject, you can use shadows to slim figures or highlights to accentuate features. Soft, natural light minimizes harsh contrasts, while dramatic lighting emphasizes shapes and textures. Experiment with angles to capture intriguing interplays of light and dark, adding emotional depth to your images. This technique not only enhances visual interest but also guides the viewer’s eye through the frame, making your photos more dynamic and engaging.
Avoiding Common Mistakes
Steer clear of overly stiff poses, poor posture, and neglecting the power of hands and feet. These mistakes can detract from the natural elegance of your photos, so always guide your subjects to relax and maintain balance for authentic, polished results.
9.1 Overly Stiff or Unnatural Poses
One of the most common mistakes in photography is allowing subjects to appear overly stiff or unnatural. This can happen when poses feel forced or uncomfortable, leading to tension in the body. To avoid this, encourage relaxation by reminding your subject to breathe deeply and soften their muscles. Avoid rigid hand placements or overly controlled expressions, as these can create an unnatural look. Instead, guide your subject toward subtle, organic movements and remind them that perfection is not the goal—authenticity is key to creating compelling, believable images.
9.2 Poor Posture and Slouching
Poor posture and slouching can significantly detract from the quality of a photograph, making subjects appear less confident or even older. Slouching often leads to unflattering lines and angles, while rounded shoulders can create a less-than-flattering silhouette. To address this, gently guide your subject to straighten their spine and relax their shoulders downward. Encourage subtle adjustments, such as rolling the shoulders back or slightly arching the lower back, to create a more balanced and natural posture. Reminding subjects to stand or sit tall can instantly improve the aesthetic of the image, ensuring a more polished and professional result.
9.3 Forgetting the Power of Hands and Feet
Hands and feet play a crucial role in enhancing or detracting from a pose, yet they are often overlooked. Stiff, awkwardly placed hands can make a photo feel unnatural, while relaxed, purposeful gestures add authenticity. Similarly, feet should be positioned thoughtfully to avoid stiffness or misalignment. Encourage subjects to keep hands soft and slightly curved, avoiding tight fists or rigid extensions. For feet, subtle weight shifts or slight angles can create a more dynamic, natural stance. Neglecting these details can undermine even the most carefully composed poses, so attention to these elements is essential for polished results.
Mastering posing techniques enhances photography quality. Practice, experiment, and encourage subjects to relax. Confidence and natural expressions create captivating photos, making your portraiture truly exceptional and memorable.
10.1 Recap of Key Posing Principles
Effective posing enhances photography by capturing authentic moments. Key principles include relaxation, natural posture, and confident body angles. Facial expressions and eye contact convey emotion, while balanced compositions create visual harmony. For individuals, elegance and strength shine through thoughtful poses, and groups benefit from interaction and varied heights. Practicing these techniques ensures polished, engaging photos that tell compelling stories. Remember, the goal is to make subjects feel at ease, allowing their true selves to shine in every frame.
10.2 Encouragement to Practice and Experiment
Practice is key to mastering posing techniques, whether you’re a novice or an experienced photographer. Experiment with different poses, lighting, and angles to find what works best for your subjects. Don’t be afraid to try new ideas and learn from mistakes. Consistent practice boosts confidence and creativity, helping you capture unique, authentic moments. Encourage your subjects to relax and express themselves naturally, and always seek feedback to refine your approach. The more you explore, the more versatile and skilled you’ll become in the art of posing.
Leave a Reply
You must be logged in to post a comment.